Unboxing and Parts Check
Start by carefully unpacking all components from the box. Ensure the package includes the tent fabric‚ frame poles‚ corner connectors‚ spill pool‚ extension skirt‚ and instructions. Verify each part against the manual to confirm nothing is missing. Organize the components to streamline the assembly process.
- Tent fabric with pre-drilled holes
- Frame poles (vertical and horizontal)
- Corner connectors and 3-way connectors
- Spill pool and extension skirt
- Zipper doors and viewing windows
- Assembly manual
Double-check for any damage or missing items before proceeding.
1.1. Identifying Components
Begin by identifying all parts included in the package. The 4×8 grow tent kit typically includes the tent fabric‚ frame poles‚ corner connectors‚ spill pool‚ extension skirt‚ and instructions. Familiarize yourself with each component:
- Tent fabric: Durable material with pre-drilled holes for frame attachment.
- Frame poles: Vertical and horizontal poles for constructing the base and support structure.
- Corner connectors: Essential for securing the frame’s stability.
- Spill pool: A protective layer for the tent floor.
- Extension skirt: Adds extra space around the tent’s base.
- Instructions: Detailed guide for assembly and troubleshooting.
Understanding each part ensures a smooth assembly process. Verify all items are included before starting.
1.2. Verifying All Parts Are Included
Carefully cross-reference each component with the parts list in the manual to ensure nothing is missing or damaged. This step is crucial for a smooth assembly process. Check for:
- 12 vertical poles and 8 horizontal poles for the frame.
- 4-way and 3-way connectors for securing the structure.
- Tent fabric with pre-drilled holes for attachment.
- Extension skirt and
- Zipper doors and
- Assembly manual for guidance.
- Zipper doors and
Double-check for any damage or missing items before proceeding with assembly.

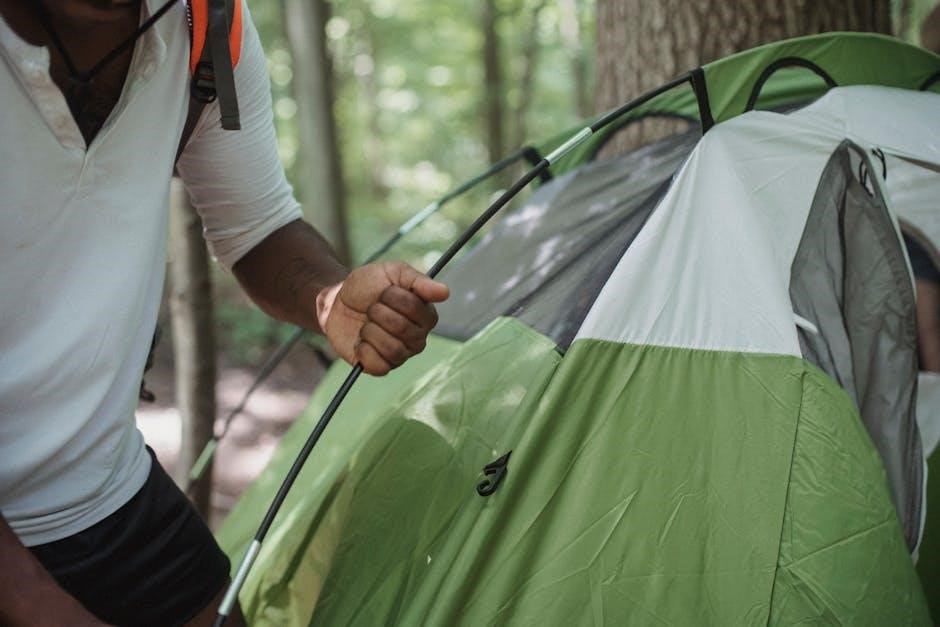
Frame Assembly
Begin by constructing the base frame using the vertical and horizontal poles. Connect the poles securely with the 4-way and 3-way connectors for stability.
Align the horizontal bars to the top of the vertical poles‚ ensuring a sturdy structure. This forms the foundation for attaching the tent fabric later.
2.1. Constructing the Base Frame
Start by connecting the vertical poles to the 4-way connectors‚ forming the base structure. Attach the horizontal bars to the vertical poles‚ ensuring a snug fit. Use the 3-way connectors to secure the corners‚ creating a stable rectangular frame. Make sure all connections are tightened firmly and the frame is square. This base structure will support the entire tent‚ so it’s crucial to ensure stability and proper alignment before moving on to the next steps.
A sturdy base frame is essential for the tent’s overall stability and durability.
2.2. Attaching Vertical Poles
Insert the vertical poles into the 4-way connectors on the base frame‚ ensuring they are securely locked. Align the poles with the pre-drilled holes on the connectors for proper fitment. Use the corner supports to reinforce the connections‚ ensuring the frame remains stable and upright. Once all vertical poles are attached‚ double-check their alignment and tighten any loose connections to maintain structural integrity. The vertical poles will form the skeleton of the tent‚ supporting the fabric and other components.
- Vertical poles
- 4-way connectors
- Corner supports
A secure attachment ensures the tent’s stability and proper shape.
2.3. Securing Corner Connectors
Attach the corner connectors to the ends of the vertical poles and base frame‚ ensuring a snug fit. Tighten the connectors firmly to create a stable and rigid frame structure. Use the provided screws or clips to secure them‚ ensuring no gaps remain. Properly aligned and tightly secured corner connectors are essential for maintaining the tent’s shape and structural integrity. Double-check each connection to confirm they are tightly fastened and evenly aligned.
- Corner connectors
- Vertical poles
- Base frame
- Securing screws or clips
Sturdy corner connectors ensure a stable and balanced frame assembly.
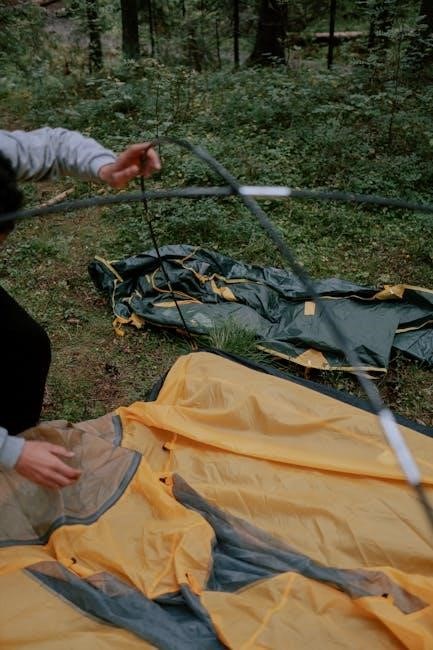
Tent Fabric Attachment
Attach the tent fabric by unfolding and laying it flat. Align the fabric with the frame‚ ensuring all corners match. Secure it using zippers or hooks for a snug fit. Properly aligning ensures a snug installation.
3.1. Unfolding and Laying Flat the Tent
Begin by unfolding the tent fabric and laying it flat on a clean surface. Ensure all zippers and doors are fully undone to prevent creases. Smooth out any wrinkles to ensure even alignment. Start by aligning the tent’s top corners with the frame’s upper connectors. Gradually work your way down‚ matching the fabric’s pre-drilled holes with the frame’s poles. Use the corner connectors to secure the fabric tightly‚ ensuring a snug fit. Proper alignment ensures a stable and balanced structure.
- Unzip all doors and windows for easy access.
- Smooth out fabric to avoid wrinkles and creases.
- Align the tent’s shape with the frame’s dimensions.
- Secure corners first‚ then work inward.
3.2. Aligning Fabric with Frame
Once the tent is laid flat‚ align the fabric with the frame by matching the tent’s corner holes to the frame’s connectors. Ensure the fabric is evenly spread and properly fitted around the poles. Start by attaching the top corners to the frame’s upper connectors‚ then work your way down. Use the provided connectors to secure the fabric tightly‚ ensuring a smooth and wrinkle-free fit. Proper alignment prevents sagging and ensures structural integrity.
- Match corner holes to frame connectors carefully.
- Ensure fabric is evenly spread and tight.
- Start from the top and work downward.
- Use connectors to secure fabric firmly.
3.3. Securing Fabric to the Frame
After aligning‚ secure the fabric to the frame using the provided connectors. Ensure a tight fit by pulling the fabric firmly over the poles. Use zippers and Velcro straps to fasten the sides and top. Check for any sagging or loose areas and tighten as needed. Properly securing the fabric ensures a stable and durable structure‚ preventing damage from wind or weight.
- Use connectors to fasten fabric tightly.
- Secure sides and top with zippers and Velcro.
- Check for sagging and tighten as needed.
Door and Window Installation
Attach zipper doors and viewing windows securely to the tent frame. Align Velcro straps and zip doors properly for a snug fit. Ensure windows are tightly fastened.
- Align Velcro straps with frame hooks.
- Zip doors to ensure airtight closure.
- Secure windows tightly to frame.
4.1. Attaching Zipper Doors
Start by aligning the zipper doors with the tent’s entrance. Ensure the Velcro straps on the doors match the frame hooks. Gently pull the zippers to secure the doors‚ making sure they fit snugly around the frame. Double-check the alignment to avoid any gaps. Zip the doors completely to ensure a tight seal. Make sure the doors are evenly spaced and properly attached for smooth operation. This step is crucial for maintaining the tent’s environment and preventing air leaks.
- Align Velcro straps with frame hooks.
- Zip doors to ensure airtight closure.
- Check door alignment for proper fit.
4.2. Securing Viewing Windows
Align the viewing windows with the designated openings on the tent. Use the provided Velcro straps to secure the windows tightly. Ensure the windows are evenly spaced and properly aligned for optimal visibility. Gently press the edges to confirm they are snug and wrinkle-free. Double-check that the windows are securely fastened to prevent any gaps. This step ensures clear visibility for monitoring plant growth without compromising the tent’s environment. Properly secured windows also help maintain humidity and temperature control inside the tent.
- Align windows with tent openings.
- Use Velcro straps for a snug fit.
- Ensure even spacing and alignment.
Ventilation Setup
Install ventilation ports and attach fans to improve airflow. Ensure proper ducting connections for efficient air circulation. This enhances temperature control and humidity management within the tent.
5.1. Installing Ventilation Ports
Locate the ventilation ports on the tent fabric‚ typically found near the top and bottom. Align the ports with the corresponding frame holes for proper airflow. Use the provided rubber seals to create a tight connection. Screw the ports into place using the included hardware. Ensure the ports are securely fastened to prevent air leaks. Double-check the fit and alignment to maintain optimal ventilation efficiency. This step is crucial for temperature and humidity control within the grow tent.
- Align ports with frame holes carefully
- Use rubber seals for airtight connections
- Tighten screws firmly to secure ports
- Verify port alignment for airflow
5.2. Securing Ducting and Fans
Attach the ducting to the ventilation ports‚ ensuring a snug fit. Use the provided clamps to secure the ducting tightly‚ preventing any air leaks. Next‚ install the fans according to the tent’s design‚ typically near the top for exhaust. Ensure the fans are balanced and properly connected to the ducting system. Double-check all connections to maintain airtight seals and optimal airflow. This step is essential for maintaining proper air circulation and temperature control within the grow tent.
- Attach ducting to ventilation ports securely
- Use clamps to prevent air leaks
- Install fans near the top for exhaust
- Ensure balanced and proper connections
Adding Extensions and Accessories
Install the spill pool underneath the tent for spill protection. Attach the extension skirt around the base for added coverage. Add accessories like trellises or netting for plant support.
- Place spill pool under the tent
- Attach extension skirt around edges
- Add trellises or netting for plants
6.1. Installing Spill Pool
Begin by placing the spill pool at the base of the tent‚ ensuring it is centered and evenly spread. Align the edges of the pool with the tent’s floor to cover the entire area. Secure the spill pool using the provided clips or adhesive strips. This prevents water or nutrient spills from damaging the floor. Ensure the pool is tightly fitted and lies flat without wrinkles for optimal protection.
6.2. Attaching Extension Skirt
Begin by positioning the extension skirt around the base of the tent‚ ensuring it aligns seamlessly with the edges. Secure the skirt using the provided Velcro strips or clips‚ making sure it fits snugly without any wrinkles or gaps. This helps in creating a tighter seal‚ improving airflow‚ and preventing light leakage. Double-check that all corners are properly attached for a secure and even fit.

Final Assembly Checks
Inspect all connections to ensure they are secure and tightly fastened. Check the tent’s stability by gently rocking it to confirm balance. Verify the fabric is evenly tensioned and free of wrinkles. Ensure all accessories‚ like doors and windows‚ are properly aligned and functional. Double-check that no parts are missing or loose. This final inspection guarantees a stable and ready-to-use growing environment.
7.1. Tightening All Connections
Tighten all frame connections using the provided Allen wrench. Start with the base‚ ensuring each pole is securely locked into the corners. Move upward‚ checking each joint and tightening as needed. Pay special attention to the 3-way and 4-way connectors‚ as these bear the most weight. Ensure the tent is square and stable by gently tugging on each pole. Avoid overtightening‚ which could damage the frame. Once all connections are snug‚ double-check for any wobbling or loose parts to guarantee structural integrity.
7.2. Ensuring Stability and Balance
Once the tent is fully assembled‚ check its stability by gently rocking it side to side and front to back. Ensure the frame is level and the structure is square. If uneven‚ adjust the legs or tighten connections as needed. Place the tent on a firm‚ even surface to prevent wobbling. For added stability‚ secure the tent to the floor or nearby heavy objects using anchors or weights. Finally‚ inspect all parts for looseness and tighten any connectors to maintain balance and prevent structural issues during use.
Setting Up the Growing Environment
Place the assembled tent in your chosen growing area. Install lighting‚ ventilation‚ and other equipment as needed. Ensure the environment is stable‚ with proper temperature and humidity control for optimal plant growth.
8.1. Placing the Tent in the Growing Area
Position the assembled grow tent in a flat‚ stable location. Ensure the area is clear of obstructions for easy access. Place the tent away from direct sunlight and drafts to maintain consistent conditions. Level the ground if necessary. Ensure the tent is on a durable‚ spill-proof surface like the provided spill pool. Secure the tent if it’s in a windy environment. This setup ensures a stable and controlled growing space for your plants.
8.2. Installing Lighting and Other Equipment
After placing the tent‚ install your growing equipment. Start with lighting‚ securing it to the frame or hanging it from the roof. Add ventilation systems‚ ensuring proper airflow. Install fans‚ ducting‚ and filters as per your setup. Attach monitoring devices like thermometers and hygrometers. Ensure all cables are safely secured with clips or ties. Test all equipment to confirm proper function. This step ensures your grow tent is fully equipped for optimal plant growth and environmental control.
Troubleshooting Common Issues
Identify common issues like frame instability or fabric misalignment. Check all connections‚ ensuring tightness and proper alignment. Consult the manual for specific solutions to resolve problems effectively.
9.1. Resolving Frame Stability Problems
If the frame feels unstable‚ check all connectors and poles for tightness. Ensure all vertical and horizontal poles are securely attached to the base and corners. Verify that no poles are bent or misaligned. If instability persists‚ double-check the assembly steps to confirm proper construction. Weight distribution should be even; if not‚ adjust the frame balance. Additional support‚ like extra connectors‚ can be used if necessary to enhance stability.
- Inspect all connections for tightness
- Ensure correct pole alignment
- Check for bent or damaged parts
- Add support if stability issues remain
9.2. Fixing Fabric Alignment Issues
If the fabric is misaligned with the frame‚ start by ensuring the tent is fully unfolded and laid flat. Check that all poles are securely attached and evenly spaced. Gently pull the fabric corners to align with the frame‚ ensuring pre-drilled holes match up. Smooth out any wrinkles to achieve a tight‚ even fit. If the fabric sags‚ tighten the connectors or adjust the frame balance. Proper alignment ensures optimal performance and prevents stress on the tent structure.
- Ensure fabric is fully unfolded
- Align corners with frame carefully
- Smooth wrinkles for a tight fit
- Adjust frame balance if needed
Maintenance and Care
Regularly clean the tent with a damp cloth to remove dust and stains. Inspect for tears or damage‚ repairing promptly to maintain integrity. Store disassembled parts dry to prevent rust and mold.
- Clean fabric with mild soap
- Inspect seams and zippers
- Dry thoroughly before storage
10.2. Regularly Inspecting for Damage
10.1. Cleaning the Tent
Regularly clean the tent to maintain a hygienic growing environment. Use a mild detergent and warm water to wipe down the fabric‚ avoiding harsh chemicals or abrasive cleaners. For tough stains‚ gently scrub with a soft brush. Rinse thoroughly and allow the tent to air dry. Avoid using hoses or excessive water to prevent moisture buildup. Clean the zippers and windows separately with a damp cloth; Regular cleaning prevents mold and mildew‚ ensuring optimal conditions for plant growth.
- Spot clean stains immediately
- Use a soft‚ damp cloth for wiping
- Avoid harsh chemicals or bleach
- Ensure fabric is fully dry after cleaning