
A comprehensive bed manual ensures a smooth, frustration-free assembly experience, leveraging platforms like Canva for visual clarity and aiding users in creating a stable, safe sleep environment․
Why a Clear Manual Matters
A well-crafted manual minimizes assembly errors, preventing stripped screws or unstable structures, as highlighted by DHP loft bed experiences․ Detailed instructions, potentially enhanced with Canva’s visual aids, empower users – even solo assemblers – to confidently build their bed․ This reduces frustration, saves time, and ensures a secure, long-lasting sleep solution․
Target Audience: Who is This Manual For?
This manual caters to all bed purchasers, from first-time apartment dwellers to experienced DIY enthusiasts․ It’s designed for individuals who prefer self-assembly, valuing clear, concise guidance․ Canva’s accessibility makes the visual components understandable for diverse users, regardless of technical skill․ The manual supports both independent builders and collaborative teams․
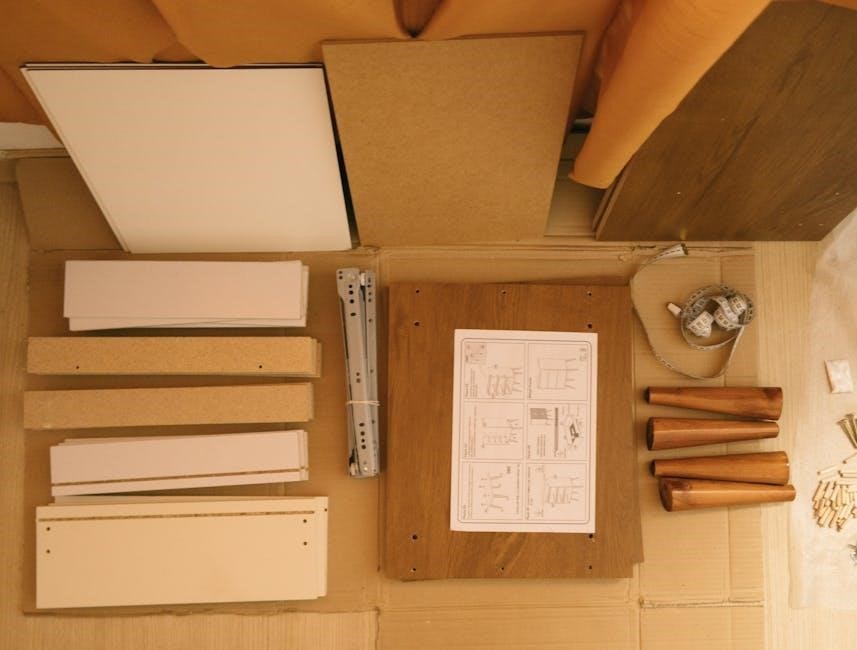
Bed Components and Parts List
Detailed inventories, potentially enhanced with Canva-created visuals, will clearly identify every part – frame pieces, slats, hardware – ensuring a complete and organized assembly process․
Identifying All Parts
Begin by meticulously listing each component: headboard, footboard, side rails, slats, and any supporting legs․ Utilize clear, descriptive names and, ideally, incorporate diagrams – perhaps designed in Canva – to visually represent each part․ Numbering each item corresponds to the parts list and assembly steps, minimizing confusion․ Accurate identification prevents errors and streamlines the entire build, ensuring a successful outcome․ Consider including dimensions for key pieces․
Hardware Breakdown: Screws, Bolts, and Washers
Detail every fastener: screw types (Phillips, Allen), bolt sizes (length, diameter), and washer variations (flat, lock)․ A table, easily created with tools like Canva, is ideal․ Specify the quantity of each․ Illustrate each fastener visually․ Clearly state where each type is used during assembly․ Grouping hardware by assembly step prevents searching and saves time, reducing frustration and ensuring correct installation․
Tools Required for Bed Assembly
Essential tools include screwdrivers, wrenches, and potentially a rubber mallet․ Consider recommending a power drill for efficiency, enhancing the assembly process significantly․
Essential Tools
For successful bed assembly, a Phillips head screwdriver is paramount, alongside a flathead for varied screw types․ An adjustable wrench is crucial for tightening bolts, while a rubber mallet gently encourages fitting parts․ A measuring tape ensures accurate alignment, preventing structural issues․ These basic tools, readily available, form the foundation for a secure and stable bed frame․ Prioritize quality for durability and ease of use during the entire process․
Recommended (But Not Required) Tools
While not essential, a power drill with appropriate bits significantly speeds up assembly, especially with numerous screws․ A level ensures the bed is perfectly horizontal, enhancing stability and sleep quality․ Work gloves protect hands, and safety glasses shield eyes from debris․ A magnetic parts tray keeps hardware organized, preventing loss and frustration․ These additions streamline the process and improve overall safety․

Step-by-Step Assembly Instructions
Follow these clear, concise instructions carefully, referencing diagrams for each stage, to ensure proper bed frame construction and secure component attachment․
Step 1: Assembling the Bed Frame
Begin by laying out all frame pieces, identifying each according to the parts list․ Connect the side rails to the head and foot boards using the provided bolts and washers․
Ensure proper alignment before fully tightening․ A second person can be incredibly helpful during this stage for stability․ Double-check all connections for a secure, wobble-free base․
Step 2: Attaching the Headboard and Footboard
Carefully position the headboard and footboard, aligning them with the pre-drilled holes on the assembled bed frame․ Securely attach using the appropriate bolts, washers, and potentially locking nuts․
Tighten all fasteners gradually and evenly to prevent warping or misalignment․ Verify a flush connection and robust stability before proceeding to the next assembly phase․
Step 3: Installing the Slats or Foundation
Evenly space the bed slats across the frame, ensuring they are securely seated within the designated supports․ For foundation installations, center it precisely onto the frame․
Fasten slats or the foundation using screws or bolts, verifying consistent spacing and a level surface․ This step is crucial for mattress support and overall bed stability; double-check all connections․

Safety Precautions During Assembly
Prioritize safety by wearing protective gear and carefully following instructions to avoid injury, protecting both yourself and the bed’s components during setup․
Avoiding Injury
Always wear safety glasses to protect your eyes from flying debris during assembly․ Utilize work gloves to prevent scrapes and blisters while handling parts․ Lift with your legs, not your back, when moving heavier components like the frame or mattress foundation․
Ensure adequate space to maneuver and avoid obstructions․ If a step feels unsafe, stop and reassess; don’t force anything․ Consider having a helper for lifting and aligning larger pieces to minimize strain and potential accidents․
Protecting the Bed Components
Assemble the bed on a protected surface – a drop cloth or cardboard – to prevent scratches and damage to both the bed and your flooring․ Avoid over-tightening screws and bolts, as this can strip threads or crack wood․
Keep all hardware organized to prevent loss and ensure correct usage․ Gently handle all parts, avoiding dropping or forceful impacts․ Store leftover components safely for future use or potential warranty claims․
Troubleshooting Common Assembly Issues
Address missing parts or stripped screws promptly; careful inventory and gentle assembly techniques, aided by clear diagrams, minimize these frustrating setbacks․
Missing Parts
If components are absent, first double-check the packaging and included parts list against the diagrams․ Contact customer service immediately, providing your order number and a detailed list of the missing items․ Do not attempt to substitute parts, as this could compromise the bed’s structural integrity and safety․
Many manufacturers offer swift replacements, ensuring a complete assembly․
Stripped Screws or Bolts
If a screw or bolt becomes stripped, immediately stop applying force․ Attempting to force it can cause further damage․ Do not use excessive power tools․ Contact customer service for replacement hardware; specifying the size and type is crucial․
Avoid using mismatched or inferior replacements, as they may not provide adequate support․

Bed Maintenance and Care
Regularly inspect and tighten all hardware to maintain bed stability and safety․ Gentle cleaning with appropriate products will preserve the bed’s appearance and longevity․
Cleaning Instructions
For most bed frames, a simple dusting with a soft, dry cloth is sufficient for routine cleaning․ Avoid abrasive cleaners that could damage the finish․ For metal frames, a damp cloth with mild soap can be used, followed by thorough drying to prevent rust․
Upholstered headboards require gentle vacuuming with an upholstery attachment․ Spot clean any stains immediately with a fabric cleaner, testing in an inconspicuous area first․ Regular care ensures your bed remains hygienic and visually appealing․
Tightening Hardware Regularly
To maintain bed stability and safety, routinely check and tighten all bolts, screws, and washers – ideally every six months․ Vibrations during use can loosen connections over time․ Use the original tools provided, or appropriately sized replacements, to avoid stripping the hardware․
Pay close attention to connections between the frame, headboard, footboard, and slats․ A proactive approach prevents squeaks and ensures long-lasting structural integrity․
Warranty Information and Customer Support
Understand your bed’s warranty coverage for parts and labor․ Keep records and know how to contact customer service for assistance with any issues․
Understanding the Warranty
Carefully review the warranty document included with your bed; it details the coverage period, what’s protected (like defects in materials or workmanship), and what voids the warranty․ Typically, warranties don’t cover normal wear and tear, misuse, or modifications․
Keep your purchase receipt as proof of date, and register your bed online if required․ Knowing the warranty terms empowers you to address potential issues confidently and efficiently․
Contacting Customer Service
Should you encounter issues not covered in this manual, or require assistance with warranty claims, don’t hesitate to contact our customer service team․ We offer support via phone, email, and often, a live chat feature on our website․
Please have your order number and bed model information readily available to expedite the process․ Our dedicated representatives are committed to providing prompt and helpful solutions․
Diagrams and Visual Aids
Detailed illustrations and parts diagrams are crucial for successful assembly, offering a clear visual guide alongside written instructions for easy comprehension․
Detailed Illustrations of Each Step
Each assembly stage benefits immensely from clear, step-by-step illustrations․ These visuals should depict the correct orientation of parts, fastener placement, and the overall progression of building the bed․ Utilizing tools like Canva can aid in creating professional-looking diagrams․ Arrows and callouts should highlight key actions and connections, minimizing ambiguity and ensuring even novice assemblers can follow along with confidence․
Parts Identification Diagrams
Detailed diagrams are crucial for quickly identifying each component․ These should showcase every part – frame pieces, headboard, footboard, slats, hardware – with clear labels and potentially, part numbers․ Consider exploded views to illustrate how pieces relate spatially․ Canva’s design capabilities can help create visually distinct and easily understandable diagrams, preventing confusion during the assembly process and ensuring correct part usage․

Optional Bed Features and Accessories
Explore enhancements like under-bed storage or headboard modifications; these additions expand functionality and personalization, complementing the core bed assembly process․
Under-Bed Storage Solutions
Maximize space utilization with thoughtfully designed under-bed storage options․ Consider rolling drawers, storage bins, or even platform beds with built-in compartments․ These solutions are ideal for storing seasonal clothing, extra linens, or infrequently used items․ Ensure any added storage doesn’t compromise bed stability or accessibility․ Platforms like Canva can visually demonstrate optimal storage configurations, aiding in planning and maximizing available space beneath the bed frame․
Headboard Modifications
Personalize your bed with headboard modifications! Explore options like adding upholstered panels for comfort, integrating shelving for books and devices, or mounting lighting for reading․ Ensure any modifications adhere to weight limits and structural integrity․ Utilize design tools like Canva to visualize potential changes before implementation, guaranteeing a cohesive and aesthetically pleasing result․ Prioritize safety and secure attachment methods during any headboard alterations․

Checking for Stability and Safety
Rigorous testing is crucial; confirm the bed’s weight capacity and ensure all connections are secure to prevent accidents and guarantee long-lasting durability․
Weight Capacity
Understanding your bed’s weight capacity is paramount for safety and longevity․ Exceeding this limit can compromise structural integrity, leading to potential collapse or component failure․
The manual must clearly state the maximum weight the bed can support, encompassing both static weight (people) and dynamic weight (movement)․
Consider distributing weight evenly and avoid concentrated loads․ Regularly inspect the frame for any signs of stress or bending․
Ensuring a Secure Assembly
A secure assembly is non-negotiable for bed safety․ Double-check all bolts, screws, and connections after initial tightening, and periodically thereafter․
The instruction manual should emphasize the importance of proper alignment and full engagement of all components․
Avoid over-tightening, which can strip threads, and ensure all hardware is appropriately sized and correctly installed for optimal stability․

Disposal and Recycling Information
Responsible disposal involves checking local regulations; metal frames are often recyclable, while other components may require specialized handling for sustainability․
Responsible Disposal Methods
Proper bed disposal minimizes environmental impact․ Consider donating gently used beds to charities․ For damaged items, separate metal components for recycling at designated facilities․ Wood parts may be repurposed or disposed of according to local waste management guidelines․ Avoid illegal dumping; research local regulations for responsible handling of mattress and frame materials․
Recycling Bed Components
Many bed parts are recyclable! Metal frames and hardware can often be recycled at scrap metal facilities․ Some mattresses have recyclable components; check with local recycling centers․ Wood slats may be repurposed or recycled depending on treatment․ Proper disassembly aids recycling efforts, reducing landfill waste and conserving valuable resources for a sustainable future․

Frequently Asked Questions (FAQ)
Common queries address missing parts, assembly difficulties, and warranty details; clear answers and troubleshooting tips ensure customer satisfaction and a positive bed-building experience․
Common Questions and Answers
Q: What if parts are missing? A: Contact customer service immediately with your order number and a parts list․ Q: Assembly seems impossible! A: Double-check each step, referencing diagrams; consider a second person for assistance․ Q: What’s the warranty coverage? A: Refer to the warranty information section for details on defects and coverage periods․ Utilizing platforms like Canva can visually clarify complex steps, reducing frustration and ensuring a successful build․

Final Checklist and Congratulations!
Before enjoying your new bed, re-tighten all hardware, ensuring stability and safety․ Verify all parts are accounted for, referencing the parts list․ Congratulations on successfully assembling your bed! Should you encounter issues, revisit troubleshooting or contact customer support․ Remember, tools and clear instructions, potentially aided by visual platforms like Canva, were key to success!