
Welcome to the Hoover SteamVac Cleaner Manual! This guide provides comprehensive instructions for using your SteamVac, including assembly, operation, and maintenance tips. Explore its features and ensure optimal cleaning results.
1.1 Overview of the Hoover SteamVac Cleaner
The Hoover SteamVac Cleaner is a versatile wet steam cleaner designed for deep cleaning carpets, upholstery, and hard floors. Weighing 11518.9 grams, it uses water or cleaning solution to effectively remove dirt and stains. Its wet cleaning type ensures thorough results across various surfaces, making it ideal for both home and professional use.
1.2 Importance of Reading the Manual
Reading the Hoover SteamVac Cleaner manual is essential for understanding its features, proper usage, and maintenance. It provides safety guidelines, troubleshooting tips, and assembly instructions, ensuring optimal performance and longevity. Familiarizing yourself with the manual helps avoid errors and enhances cleaning efficiency across various surfaces.
Key Features of the Hoover SteamVac Cleaner
The Hoover SteamVac Cleaner features advanced cleaning technologies, ensuring efficient and versatile cleaning solutions for various surfaces and stains with enhanced performance and user-friendly design, making it ideal for home and professional use.
2.1 Clean Surge Technology
The Clean Surge Technology provides an extra burst of cleaning solution for tough stains. Activate it to release more solution, targeting embedded dirt and enhancing deep cleaning efficiency. This feature is exclusive to Hoover, making the SteamVac ideal for tackling stubborn spots on carpets, upholstery, and stairs with minimal effort and maximum effectiveness.
2.2 Agitator Brush Settings (HL and LO)
The Hoover SteamVac features HL and LO agitator brush settings for tailored cleaning. HL is ideal for normal cleaning on carpets and bare floors, while LO provides a gentler touch for delicate surfaces. These adjustable settings ensure effective cleaning without damaging your floors, offering versatility for various cleaning tasks and surface types with ease and precision.
2.3 Versatile Cleaning Capabilities
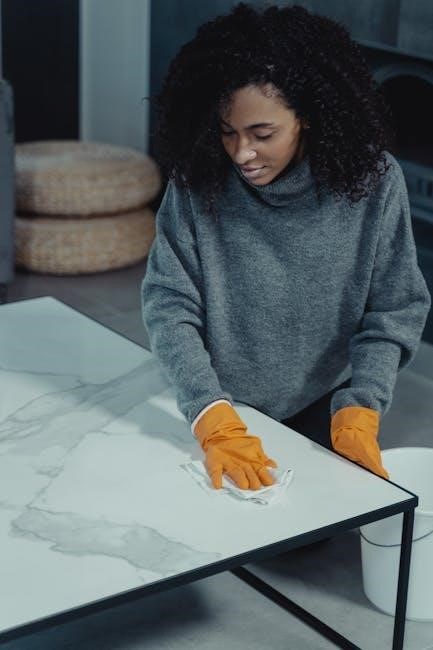
The Hoover SteamVac excels in versatile cleaning, effectively tackling carpets, stairs, upholstery, and bare floors. Its wet cleaning design uses water or solution to remove dirt and stains effortlessly. This adaptability makes it perfect for deep cleaning various surfaces, ensuring a thorough and efficient cleaning experience for your home with minimal effort and maximum results, every time you use it.
Assembly and Setup Instructions
Begin by unpacking and organizing all components. Follow the step-by-step guide to assemble the SteamVac, ensuring all parts are securely attached. This section helps you prepare the cleaner for its first use, guaranteeing proper function and effective cleaning results.
3.1 Unpacking and Initial Assembly
Exciting to start! Carefully unpack your Hoover SteamVac, ensuring all components are included. Inspect for damage and verify all parts like the solution tank, brushes, and hoses. Begin by attaching the handle and checking the brush settings; Follow the manual’s step-by-step guide for a smooth assembly process. For first-time users, lay out all parts on a flat surface to avoid missing anything. Organize accessories neatly for easy access later. This initial setup ensures your SteamVac is ready for its first use.
3.2 Attaching Tools and Accessories
Attach tools and accessories to your Hoover SteamVac by aligning connection points securely. Insert upholstery and stair tools into the designated ports. Ensure proper fitting to maintain suction power. For specialized cleaning, use the Clean Surge feature by pressing the button. Always refer to the manual for specific attachment guidelines and diagrams to ensure correct installation and optimal performance. This step enhances versatility and efficiency in cleaning various surfaces effectively.

Operating the Hoover SteamVac Cleaner
Operating your Hoover SteamVac involves filling the clean solution tank, adjusting brush settings, and using it on carpets, stairs, or upholstery. Apply pre-treatment for tough stains and ensure proper suction for effective cleaning results across various surfaces.
4.1 Filling the Clean Solution Tank
To fill the clean solution tank, remove it from the SteamVac and add Hoover PreCleaner solution. Test for colorfastness by spraying a hidden area, waiting 10 minutes, and blotting with a cloth. Ensure the tank is filled to the recommended level and properly reinstalled to avoid leaks or damage during operation.
4.2 Using the Cleaner on Different Surfaces
The Hoover SteamVac is designed for versatile cleaning on carpets, stairs, upholstery, and bare floors. Avoid using it on hardwood floors to prevent damage. For carpets and bare floors, use the HL setting for normal cleaning and LO for gentle cleaning. Always test surfaces for colorfastness before use to ensure safe and effective cleaning results.
4.3 Applying Pre-Treatment Solutions
For tough stains, pre-treat with Hoover PreCleaner solution. Spray on the spot, wait 10 minutes, then blot with a clean cloth. Ensure the surface is colorfast by testing in an inconspicuous area first. This step enhances cleaning efficiency and helps maintain the appearance of your carpets and upholstery.
Maintenance and Care Tips
Regularly clean the solution tank, dry the machine after use, and store it properly to maintain efficiency and longevity. Follow these steps to keep your SteamVac in optimal condition.
5.1 Cleaning the Solution Tank
Regularly clean the solution tank to prevent dirt buildup and maintain cleaning efficiency. Empty and rinse the tank after each use. For thorough cleaning, mix mild detergent with warm water, soak, then scrub gently. Avoid harsh chemicals or abrasive materials. Rinse thoroughly and dry before storing to prevent mold or mildew growth. Always ensure the tank is completely dry to maintain hygiene and performance.
5.2 Drying the Machine After Use
After each use, ensure the machine is thoroughly dried to prevent moisture buildup and mold growth. Detach all accessories and drain excess water from the tank. Use a clean, dry cloth to wipe down surfaces. Allow the machine to air dry in a well-ventilated area. Regular drying helps maintain hygiene and ensures optimal performance for future cleaning tasks.
Check for any residual moisture, especially in crevices and hoses. A dry machine prevents bacterial growth and keeps it ready for the next use. Proper drying is essential for longevity and efficiency of your Hoover SteamVac Cleaner.
5.3 Storing the Cleaner Properly
Store your Hoover SteamVac Cleaner in a cool, dry place after thorough drying. Remove and clean all attachments, then store them separately. Keep the machine upright to prevent tipping. Ensure the solution tank is empty and dry. Store the power cord neatly to avoid tangling. Proper storage protects the cleaner from damage and ensures it remains in good condition for future use.
Troubleshooting Common Issues
Address common problems like low suction, brush malfunctions, or leaks. This section helps you identify and resolve issues quickly, ensuring your SteamVac operates efficiently.
6.1 Low Suction Power
Low suction power can result from blockages or an empty solution tank. Check for debris in the hose or nozzle and ensure the tank is filled properly. If issues persist, inspect the belts and brushes for damage or misalignment. Regular maintenance, like cleaning filters, can also restore optimal performance. Refer to the troubleshooting section for detailed solutions.
6.2 Brush Malfunction
Brush malfunction may occur due to debris blockage or misalignment. Check for tangled hair or dirt accumulation and clean thoroughly. Ensure brushes are properly secured and aligned. If damage is detected, replace worn or broken brushes. Regular inspection and maintenance can prevent such issues, ensuring efficient cleaning performance. Refer to the manual for replacement instructions.
6.3 Leaks or Water Damage
Leaks or water damage may occur due to improper tank installation or cracks in hoses. Regularly inspect tanks and hoses for damage. Tighten all connections securely. If a leak occurs, turn off the machine, unplug it, and assess damage. Replace damaged parts promptly. Clean up spills immediately to avoid water damage. Ensure thorough drying after use to prevent mold or electrical issues.
Accessories and Replacement Parts
Explore a range of accessories like upholstery and stair tools for versatile cleaning. Replacement brushes and belts ensure optimal performance. Use genuine Hoover parts for longevity and reliability.
7.1 Upholstery and Stair Tools
The Hoover SteamVac comes with versatile upholstery and stair tools, designed for detailed cleaning of stairs, upholstery, and hard-to-reach areas. These attachments ensure thorough cleaning of delicate surfaces without damage. For models like the SteamVac with Clean Surge, these tools enhance versatility, allowing users to tackle various cleaning tasks efficiently. Always test for colorfastness before use on fabrics.
7.2 Hoover PreCleaner Solution
Hoover PreCleaner Solution is designed to enhance cleaning efficiency by pretreating stains and dirt. For optimal results, spray the solution on spots, wait ten minutes, and blot with a white cloth. Always test for colorfastness on a hidden area before applying to ensure fabric safety. This solution is recommended for use with the SteamVac to maximize cleaning effectiveness and protect surfaces.
7.3 Replacement Brushes and Belts
Replacement brushes and belts are essential for maintaining your Hoover SteamVac’s performance. Over time, brushes may wear out, and belts can stretch or break. Regularly inspect and replace these parts with genuine Hoover replacements to ensure optimal cleaning efficiency. Proper maintenance will extend the life of your SteamVac and keep it running smoothly for years to come.
Safety Precautions
Ensure safe operation by following guidelines to avoid damage or injury. Always test surfaces for colorfastness and avoid using the cleaner on hardwood floors. Follow electrical safety tips for optimal performance and longevity.
8.1 Avoiding Hardwood Floors
Always avoid using the Hoover SteamVac on hardwood floors, as it may cause damage or leave residue. Use it only on carpets, upholstery, and stairs. Ensure surfaces are colorfast by testing a small area first. Follow this precaution to maintain your cleaner’s efficiency and protect your flooring. Refer to model-specific guidelines for further details.
8.2 Testing for Colorfastness
Before using the Hoover SteamVac, test surfaces for colorfastness. Spray a small, hidden area with Hoover PreCleaner, wait 10 minutes, then blot with a white cloth. If no color transfers, it’s safe to clean. This step prevents damage to sensitive materials and ensures effective cleaning without discoloration. Always follow this precaution for reliable results.
8.3 Electrical Safety Guidelines
Always unplug the Hoover SteamVac when not in use or during maintenance. Avoid exposing electrical components to water. Use genuine Hoover parts to ensure compatibility and safety. Keep the cleaner away from water sources to prevent electrical hazards. Follow all safety precautions to maintain electrical integrity and ensure reliable performance.
Comparing Hoover SteamVac Models
Explore the differences between SteamVac models, including the SteamVac with Clean Surge, Dual V Deep Cleaner, and V2 series. Each offers unique features like advanced cleaning technology and versatile settings.
9.1 SteamVac with Clean Surge (F5903-900)
Discover the SteamVac with Clean Surge (F5903-900), a powerful wet steam cleaner designed for deep cleaning. Featuring Clean Surge technology for tough stains and adjustable brush settings, it tackles carpets, stairs, and upholstery effortlessly. Lightweight and versatile, it includes essential tools for comprehensive cleaning. Download the manual for setup and usage guidance.
9.2 SteamVac Dual V Deep Cleaner
The SteamVac Dual V Deep Cleaner is designed for deep carpet cleaning, utilizing hot tap water and cleaning solution to penetrate fibers. Its dual V technology enhances cleaning efficiency, tackling tough stains and dirt effectively. Ideal for deep cleaning, it ensures a thorough rinse, leaving carpets fresh and clean. Refer to the manual for detailed operation and maintenance tips.
9.3 SteamVac V2 Models
The SteamVac V2 models offer enhanced cleaning performance with advanced brush technology and lightweight design. They provide versatile cleaning options for carpets, upholstery, and stairs. Eco-friendly features and improved efficiency make them a popular choice. Refer to the manual for specific V2 model instructions and optimal cleaning techniques to maximize your cleaning experience.
Eco-Friendly Cleaning Tips
Opt for eco-friendly cleaning solutions and energy-efficient modes to reduce environmental impact. The SteamVac V2 models are designed with eco-conscious features for sustainable cleaning.
10.1 Using Eco-Friendly Cleaning Solutions
For eco-friendly cleaning, use Hoover’s recommended PreCleaner solution or opt for biodegradable alternatives. Avoid harsh chemicals and always test for colorfastness on a hidden area. Dilute solutions as directed to minimize environmental impact while maintaining cleaning efficiency. The SteamVac’s water-based cleaning system naturally reduces chemical usage, promoting sustainable cleaning practices for your home.
10.2 Energy Efficiency Features
The Hoover SteamVac is designed with energy efficiency in mind. It uses less power compared to traditional deep cleaners while delivering effective results. The Clean Surge technology optimizes energy use by providing extra cleaning power only when needed. This feature ensures minimal energy consumption without compromising performance, making it an eco-conscious choice for your cleaning routine.

User Reviews and Feedback
Users praise the Hoover SteamVac for its effectiveness in deep cleaning carpets and versatility. Many highlight its ease of use and the benefits of Clean Surge technology. Some note it can be heavy, but overall, it’s a reliable choice for thorough cleaning tasks.
11.1 Common User Experiences
Users often praise the Hoover SteamVac for its deep cleaning effectiveness and versatility across carpets, stairs, and upholstery. Many highlight its ease of use and the convenience of features like Clean Surge. However, some note its weight and the need for regular maintenance. Overall, it’s a reliable choice for thorough cleaning tasks, with most users satisfied with its performance and results.
11.2 Tips from Experienced Users
Experienced users recommend pre-treating stains, using the Clean Surge feature for tough spots, and adjusting brush settings based on surface type. Regularly cleaning the solution tank and drying the machine after use ensures longevity. Testing for colorfastness before cleaning and using Hoover-approved solutions are also highly advised for optimal results and machine performance.
The Hoover SteamVac Cleaner Manual guides users through effective cleaning, maintenance, and troubleshooting. By following these steps, you can maximize efficiency and extend the life of your cleaner.
12.1 Summary of Key Points
The Hoover SteamVac Cleaner Manual provides essential guidance for optimal performance. Key points include proper assembly, filling the solution tank, using pre-treatment solutions, and maintaining the cleaner. Regular maintenance, such as cleaning the tank and drying the machine, ensures longevity. Always test surfaces for colorfastness and avoid hardwood floors. Follow these tips for efficient and effective cleaning results every time.
12.2 Final Thoughts on the Hoover SteamVac
The Hoover SteamVac Cleaner Manual is a valuable resource for maximizing your cleaning experience. With its versatile features and eco-friendly options, this cleaner offers reliable performance for various surfaces. By following the manual’s guidelines, users can ensure efficient cleaning and extend the lifespan of their machine, making it a practical and effective choice for home maintenance.